What if the AI portrait skin looks too fake? Use PixPix to fix the plastic look and restore natural texture.
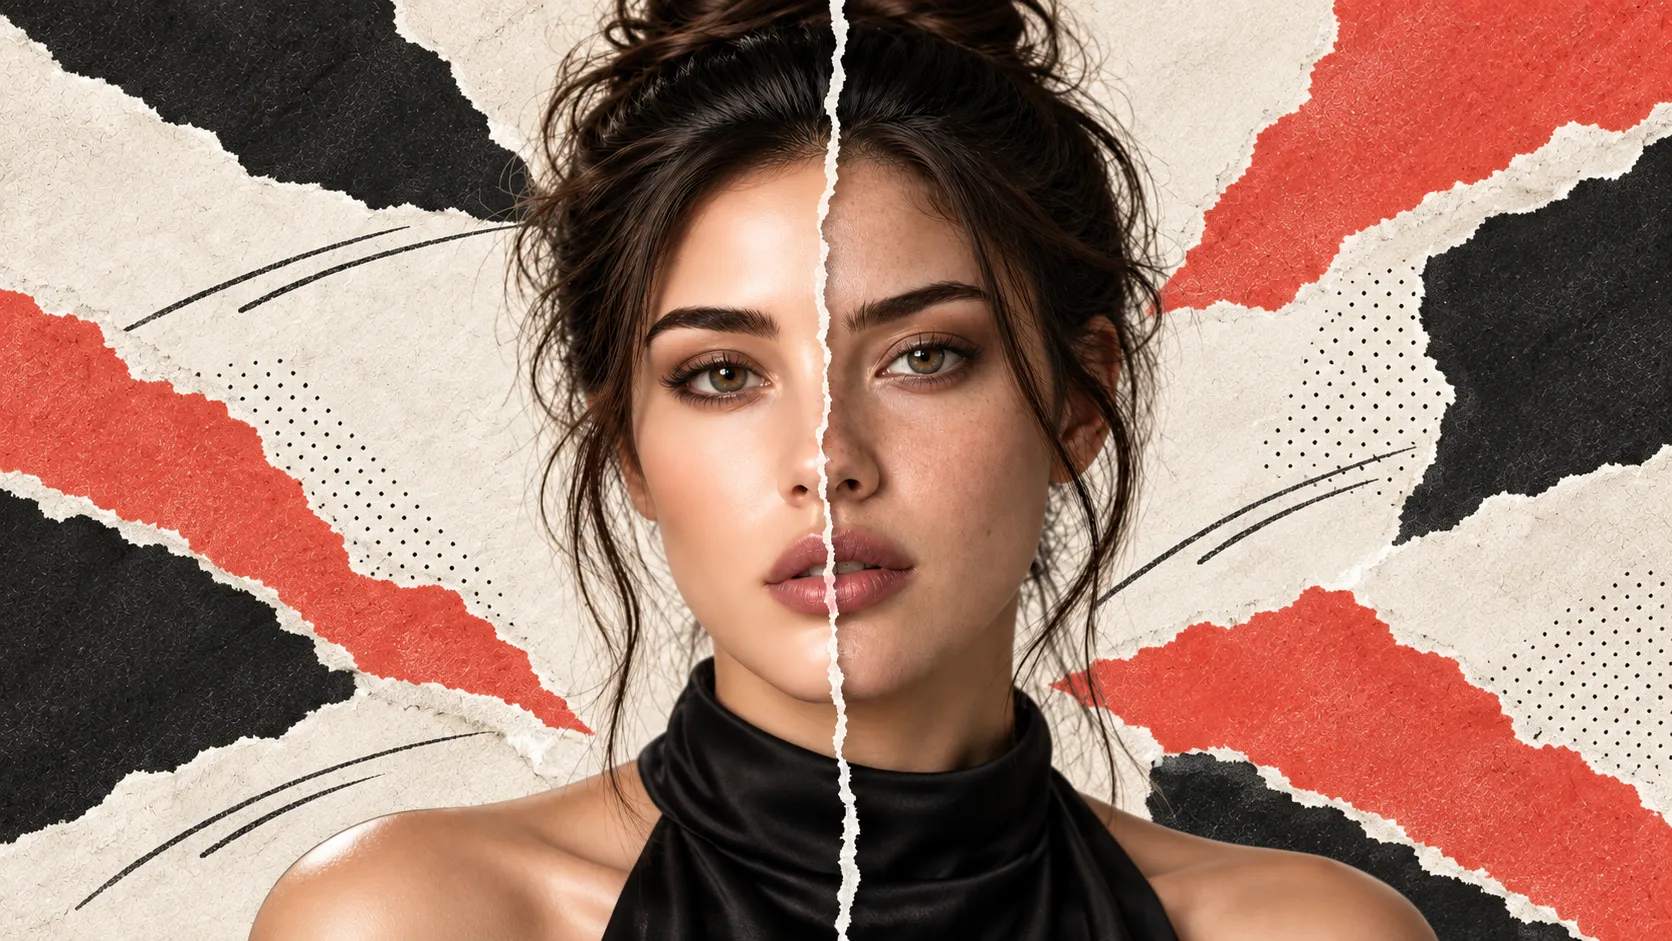
AI-generated portraits may have perfectly symmetrical facial features and beautifully balanced lighting, but if the skin appears overly smooth, uniformly reflective, or coated with a layer of wax, the entire image loses its credibility. Such issues are often referred to as “plastic‑looking skin.”
The goal of restoration isn’t simply to add as many pores as possible; rather, without altering the subject’s identity, age, makeup, or lighting, it aims to restore an appropriate level of microscopic texture, subtle variations in skin tone, and natural highlights.
This article uses an original fictional character as a case study to demonstrate how to identify the source of plasticity in PixPix, delineate localized editing areas, craft restrained repair instructions, and simultaneously ensure both realistic skin texture and overall character consistency. The example serves to illustrate the method and does not represent actual test results from any specific model.
Quick conclusion: Prioritize preserving the subject’s identity first, then refine skin details.
AI portrait skin restoration can be carried out in the following sequence:
Save the original version without further processing;
Determine whether the issue stems from missing texture, overly flat highlights, excessively uniform coloration, or sharpening and filters;
Select only the targeted skin areas—such as the forehead, cheeks, sides of the nose, and chin—for treatment;
In your instructions, clearly specify both what to enhance and what to keep unchanged;
Begin with a single, restrained correction to restore natural variation;
Inspect the result at both full size and 100% magnification;
Once identity, lighting, and skin quality all pass inspection, proceed with final image enhancement.
Realism arises from deliberate, uneven texture—not by covering the entire face with uniformly sharp pores.
“Plasticity” is more than just a lack of pores
When examining AI-generated portraits, you can identify potential issues through four key indicators.
Microscopic texture has been smoothed out
Natural skin exhibits varying levels of detail—tiny pores, fine hairs, shallow lines, and subtle local contours. Plastic-looking portraits often compress these elements into a uniform, flat surface, particularly noticeable on the cheeks, forehead, and sides of the nose.
However, pores aren’t the only culprit. If you simply overlay high-contrast grain, the skin can end up looking like sandpaper or a noisy, over‑processed image.
Highlights appear continuous, like a coating
The reflections on real skin are influenced by sebum, facial curvature, pores, and the area of the light source. The bridge of the nose, forehead, and cheekbones may appear brighter, but they don’t form broad, evenly lit highlight bands across every region.
When the entire cheek turns pale and the forehead glows like a plastic shell—even with visible pores—the image can still look artificial.
Skin tone variations are too uniform
Real skin tones rarely consist of a single solid color. Under the eyes, around the nose, on the cheeks, and under the chin, there are subtle shifts in warmth, coolness, redness, and brightness. These variations should be gentle and follow the ambient lighting, rather than randomly introducing obvious patches of color.
Boundaries blend with other materials
Excessive smoothing often softens not only the skin but also the eyelids, lip lines, eyebrows, hairline, and surrounding areas. If subsequent sharpening is applied uniformly across the entire face, the edges of hair and skin textures may become exaggerated, resulting in halos, jagged edges, or an unnatural “brittle” appearance.
First, determine where the problem originated
Before beginning repairs, review the generation and editing process:
Observed phenomenon | Possible causes | Prioritize processing |
|---|---|---|
Overall facial smoothing like a skin‑refining filter | Excessive smoothing during generation or excessive filter stacking in post-processing | Revert to the pre‑filter version and locally restore texture |
Clear facial features but cheeks look waxy | Insufficient skin texture and tonal variation | Correct cheek texture and highlight transitions |
Small images become blurry when enlarged | Insufficient original information | Reprocess using the largest, clearest existing version |
Increasingly artificial after multiple rounds of editing | Repeated regenerations cause detail drift | Revert to an earlier version and reduce the number of processing iterations |
Clear pores but the person doesn’t resemble the original | Overly free reconstruction | Reduce the range of variation and strengthen identity constraints |
If the eyes, nose, mouth, and facial shape have already changed noticeably, the issue is no longer just about skin texture. Continuing to add more details at this point will only make the mistaken identity even more apparent; you should revert to a version where the identity remains correct and reprocess it.
Establishing Original Cases and Identity Anchors
The case character is set as a fictional adult woman named “Mira”: warm olive skin tone, dark brown hair styled into a slightly loose high bun with natural strands left on either side, thick dark eyebrows and hazel eyes serving as key identifying features. She wears an unmarked black satin turtleneck, facing the camera directly, with soft sidelight highlighting her facial contours against an ivory-to-grayish-brown gradient background.
The version to be repaired has three issues: the texture on both cheeks has been smoothed out, the highlights on the forehead are overly continuous, and there’s a lack of subtle color variation between the nasal wings and the cheeks.
The essential identity anchors that must be preserved include:
Facial contours, eye spacing, and eyebrow shape;
Nasal bridge, nasal wings, and lip shape;
Hazel irises, gaze, and eyelash direction;
Dark brown high bun, side strands, and hairline;
Age perception, natural light makeup, and facial expressions;
Front-facing camera position, head angle, soft sidelight, and warm gray gradient background.
The only areas allowed to vary are on the skin’s surface: pore size, fine vellus hair, localized variations in skin tone, and the transition of highlights on the forehead and cheeks.
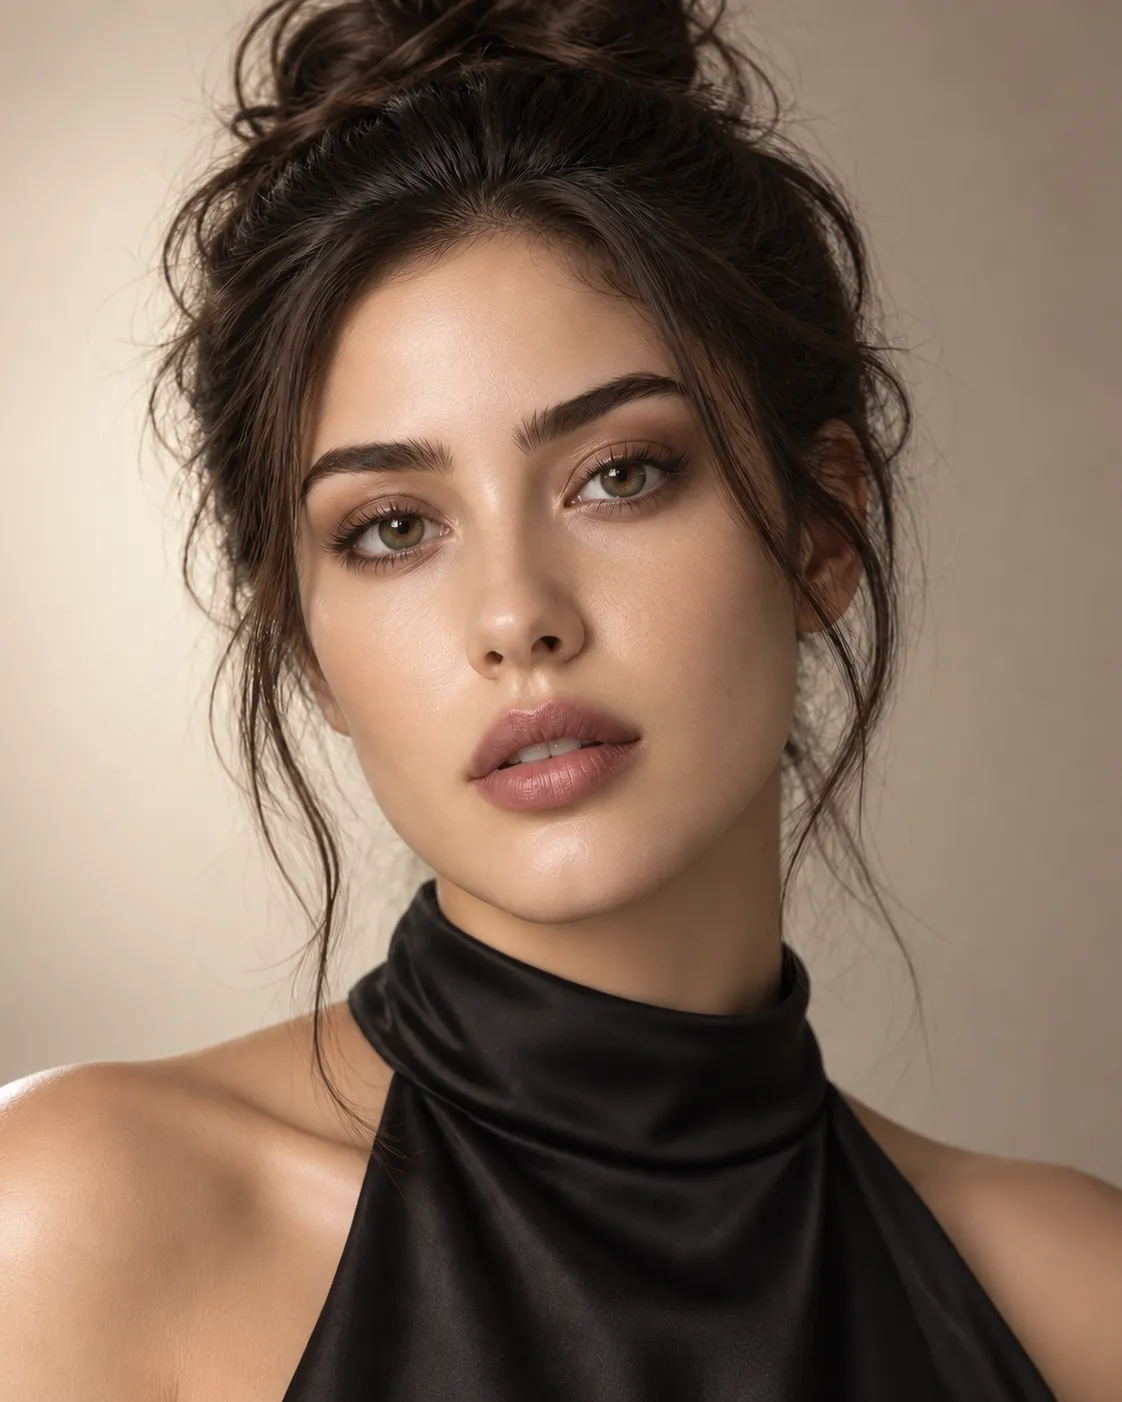
Caption: Before restoration, the subject’s identity, hairstyle, clothing, and soft lighting on the left side were all intact; the issues lay primarily in missing texture on both cheeks, overly flat skin tones, and waxy reflections on the forehead.
Performing Local Skin Restoration in PixPix
The official PixPix page currently showcases capabilities such as natural-language image editing, local retouching, and quality enhancement. The specific interface may change with each version; below, we adopt a workflow centered on local editing, without relying on face sliders or mode names unique to reference platforms.
Start with the clearest, least processed version
Prioritize using the largest available image size, ensuring the face is unobstructed and eyes and hairline are clearly visible. Do not first apply a smoothing filter and then attempt to restore texture, since information erased cannot be reliably reconstructed by AI and may not match the original details.
Before beginning, keep a copy of the original image to compare all subsequent results against it. If the subject is a real client, model, or yourself, also confirm that you have proper authorization for using and editing the image.
The selection should cover only the skin requiring modification
It is recommended that the selection include the forehead, both cheeks, the sides of the nose, and the chin, while avoiding:
the eyeballs, eyelashes, and edges of the eyelids;
the eyebrows, hairline, and stray hairs;
the lip contours and teeth;
ear accessories, collars, and background boundaries;
small moles or freckles that must remain intact.
Leave a small margin around the selection to avoid noticeable seams between the restored area and the original image. If only one cheek is problematic, address that side first—there’s no need to redo the entire face at once.
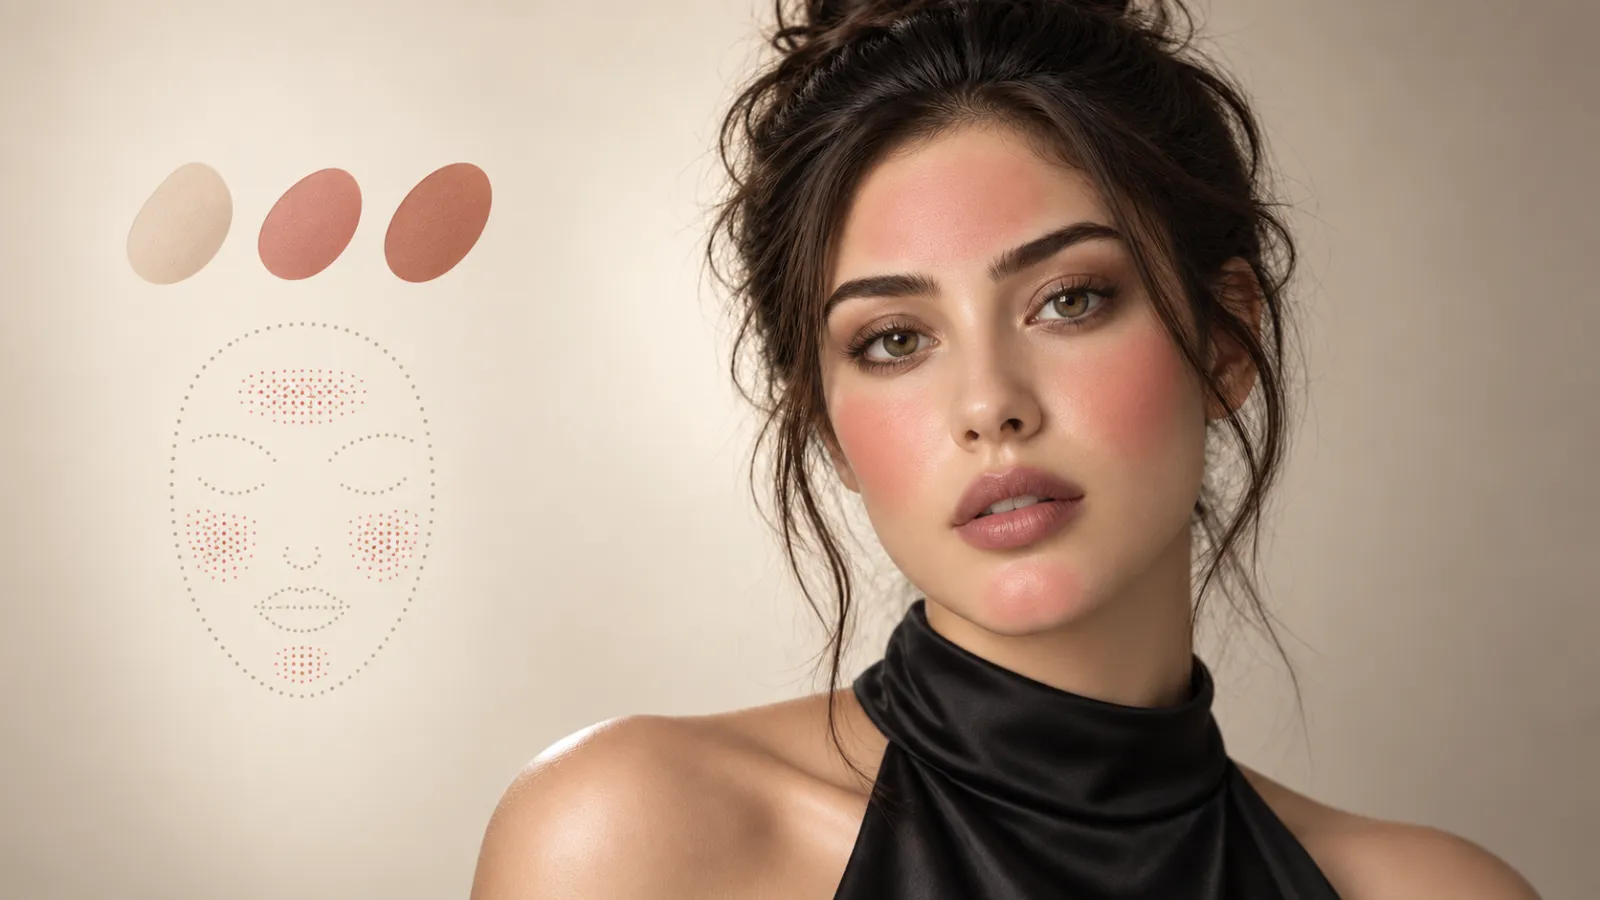
Caption: Coral color indicates skin surfaces eligible for restoration; eyes, eyebrows, lips, nostrils, hairline, and facial contours remain outside the selection.
Simultaneously describe added details and preserved elements
Simply stating “make the skin more realistic” is too vague—it could inadvertently alter makeup, age, or facial features. A more precise instruction should specify texture scale, lighting relationships, and identity constraints.
Reproduction suggestion prompt
Only restore the skin surface within the selected area, reviving restrained, natural, and finely scaled pores, minimal facial vellus hair, and subtle changes in skin tone. Maintain the soft lighting on the left side, preserve the natural highlights on the forehead and cheekbones, but reduce continuous waxy reflections; retain slight warm-toned variations on the sides of the nose and cheeks. Keep the subject’s facial shape, proportions of facial features, hazel eyes, thick eyebrows, lip shape, high bun hairstyle, side strands, sense of age, makeup, expression, head angle, warm gray background, and overall composition unchanged. Avoid adding deep wrinkles, exaggerated freckles, pimples, sharpened halos, or grainy noise.
This prompt was restructured specifically for the case study presented here—not the original prompt from the reference article, nor corresponding to any unverified PixPix-specific parameter.
In the first round, focus on restoring highlights and large-scale changes
First observe whether the forehead and cheeks have shed their uniform waxy sheen and whether light and shadow once again follow the left-side window illumination. At this stage, pores do not need to appear sharply visible in the thumbnail; if you still see graininess across the entire face after zooming out, the texture is likely already overdone.
If the first round only improves part of the image, do not immediately redo the entire face. Narrow the second selection down to the still-too-flat areas, and explicitly state in your instructions to leave the already improved sections untouched.
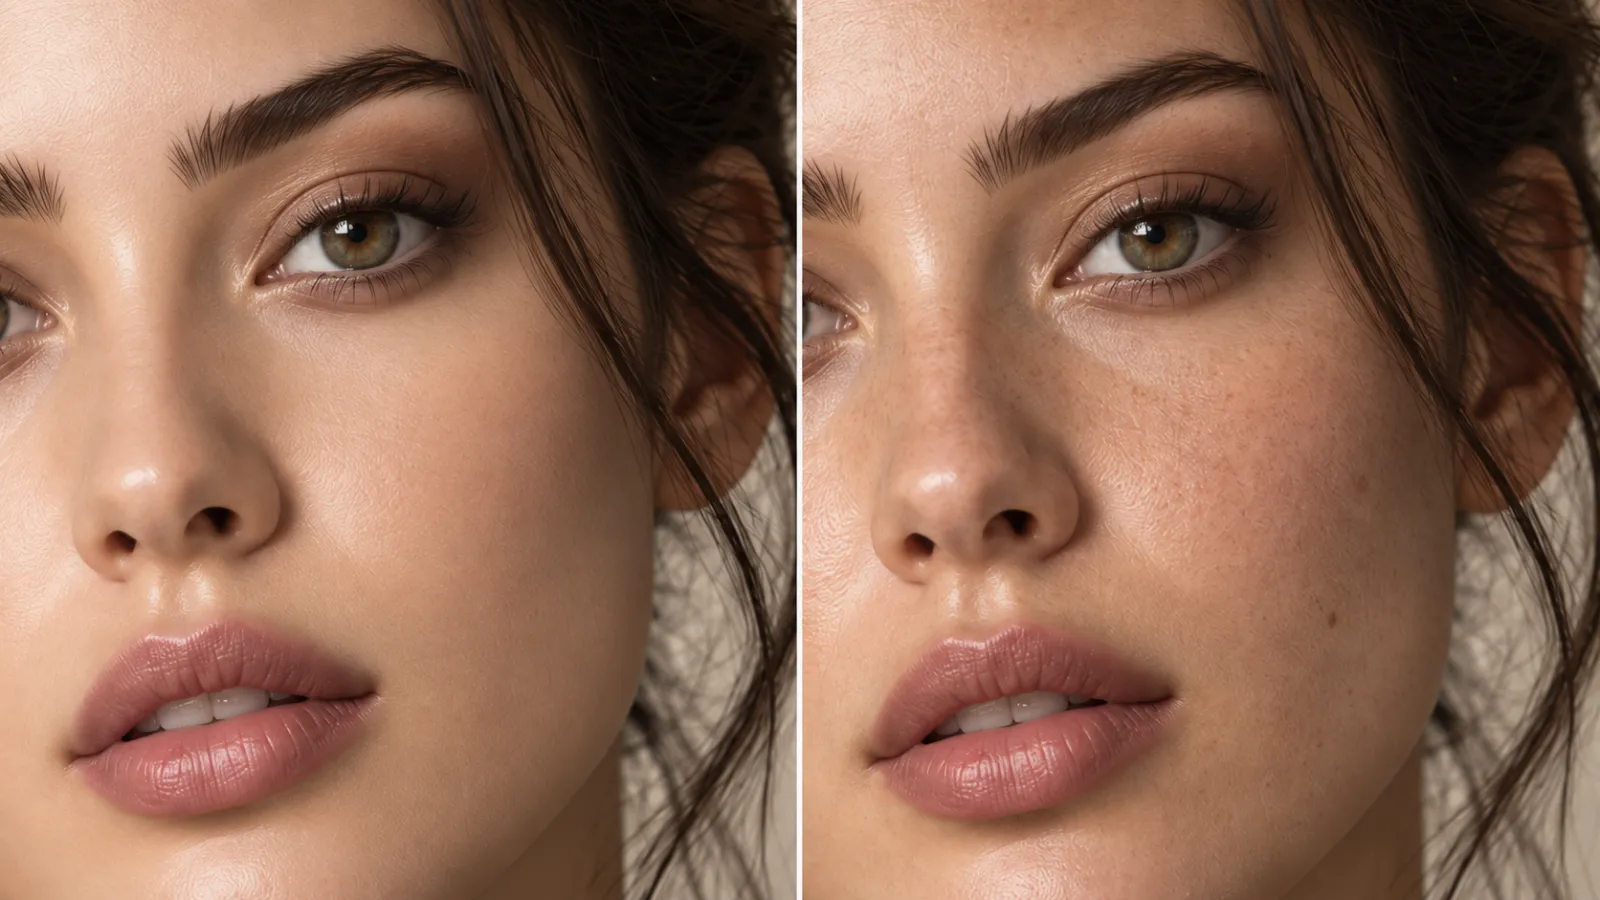
Caption: On the left is an instructional version showing excessive waxiness and smoothness; on the right, restrained texture, subtle skin tone variations, and interrupted highlights have been restored. Both subjects’ identities and camera positions remain consistent.
Use two different zoom levels to evaluate the results
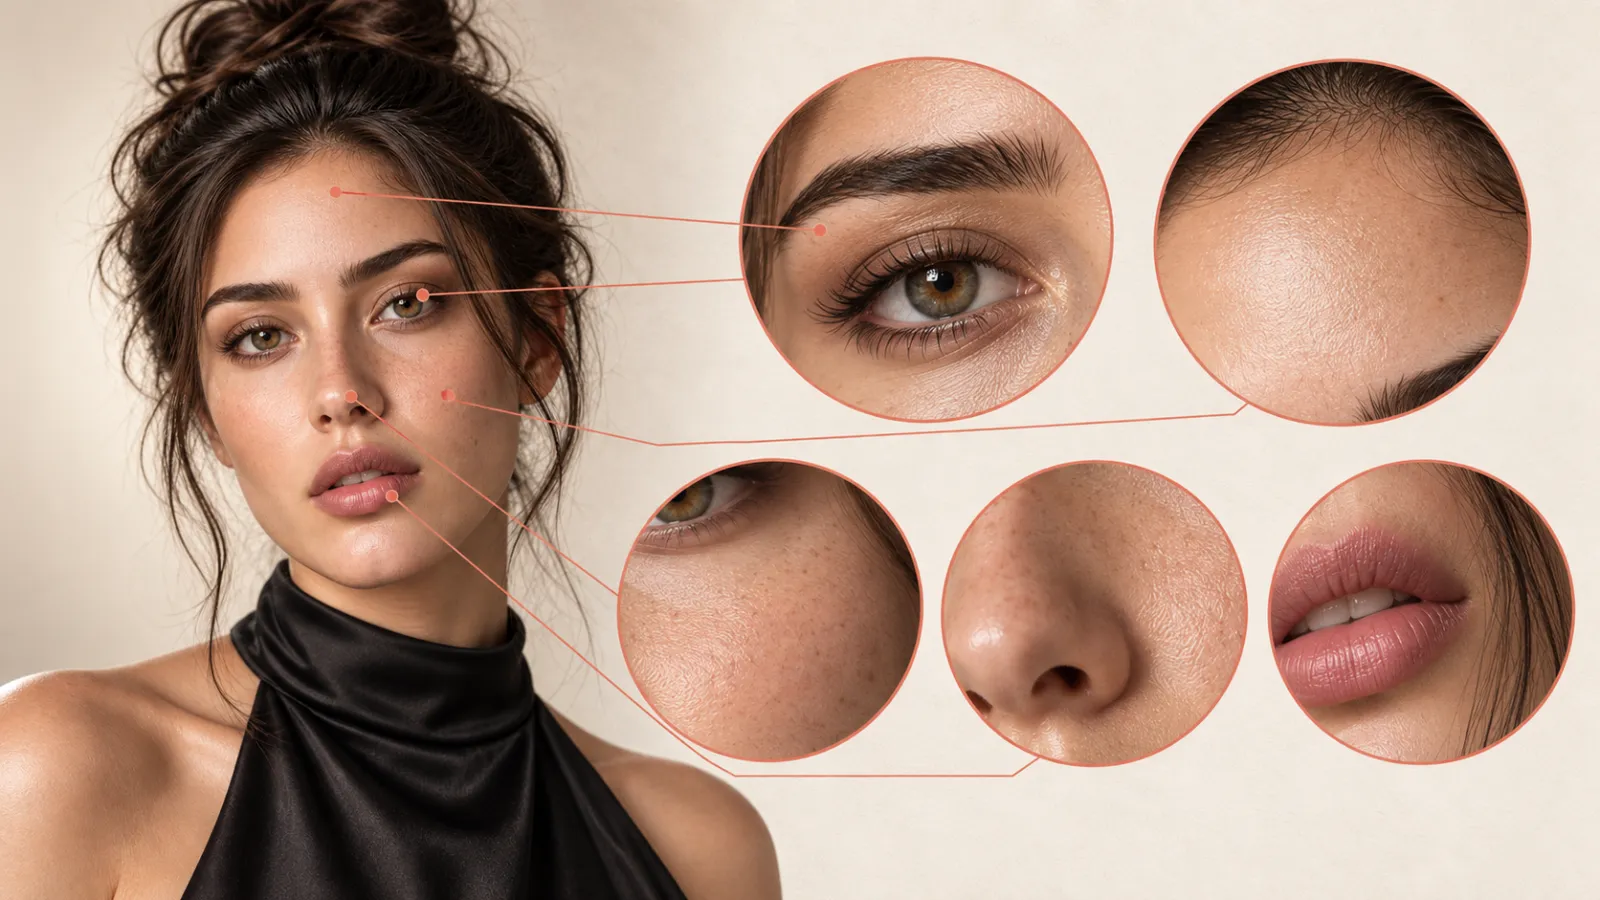
Caption: The five magnified areas correspond, in order, to the eyebrow identity, cheek texture, forehead highlights, nasal-side skin tone, and lip border. First, check whether the person is still the same individual, then assess whether the skin looks natural.
First, examine the overall size to verify the subject’s identity.
View the before-and-after side by side, and begin by answering:
Is the person still recognizable as the same individual?
Has the sense of age, expression, or makeup changed?
Have the eye spacing, nose width, lip shape, or jawline shifted?
Are small moles, hairline, and ear contours preserved?
Have the left-side window lighting and background color been retouched?
As long as there is a noticeable change in identity—even if the skin appears smoother—the result cannot be considered satisfactory.
Next, zoom in at 100% to examine the skin’s scale.
Zoom in to inspect the forehead, nose wings, cheekbones, and chin:
Do pores vary in size and density rather than repeating uniformly?
Does the texture follow the facial curvature?
Are highlights naturally interrupted by subtle textures?
Is there a controlled transition of skin tone between the nose wings and cheeks?
Are the boundaries between the skin and eyebrows, eyelashes, and lips clean?
Have any sharpened white edges, noise, or localized blurriness appeared?
Finally, return to normal viewing size. A result that looks good only when viewed at 100% magnification but appears rough when scaled down is likewise unsuitable for delivery.
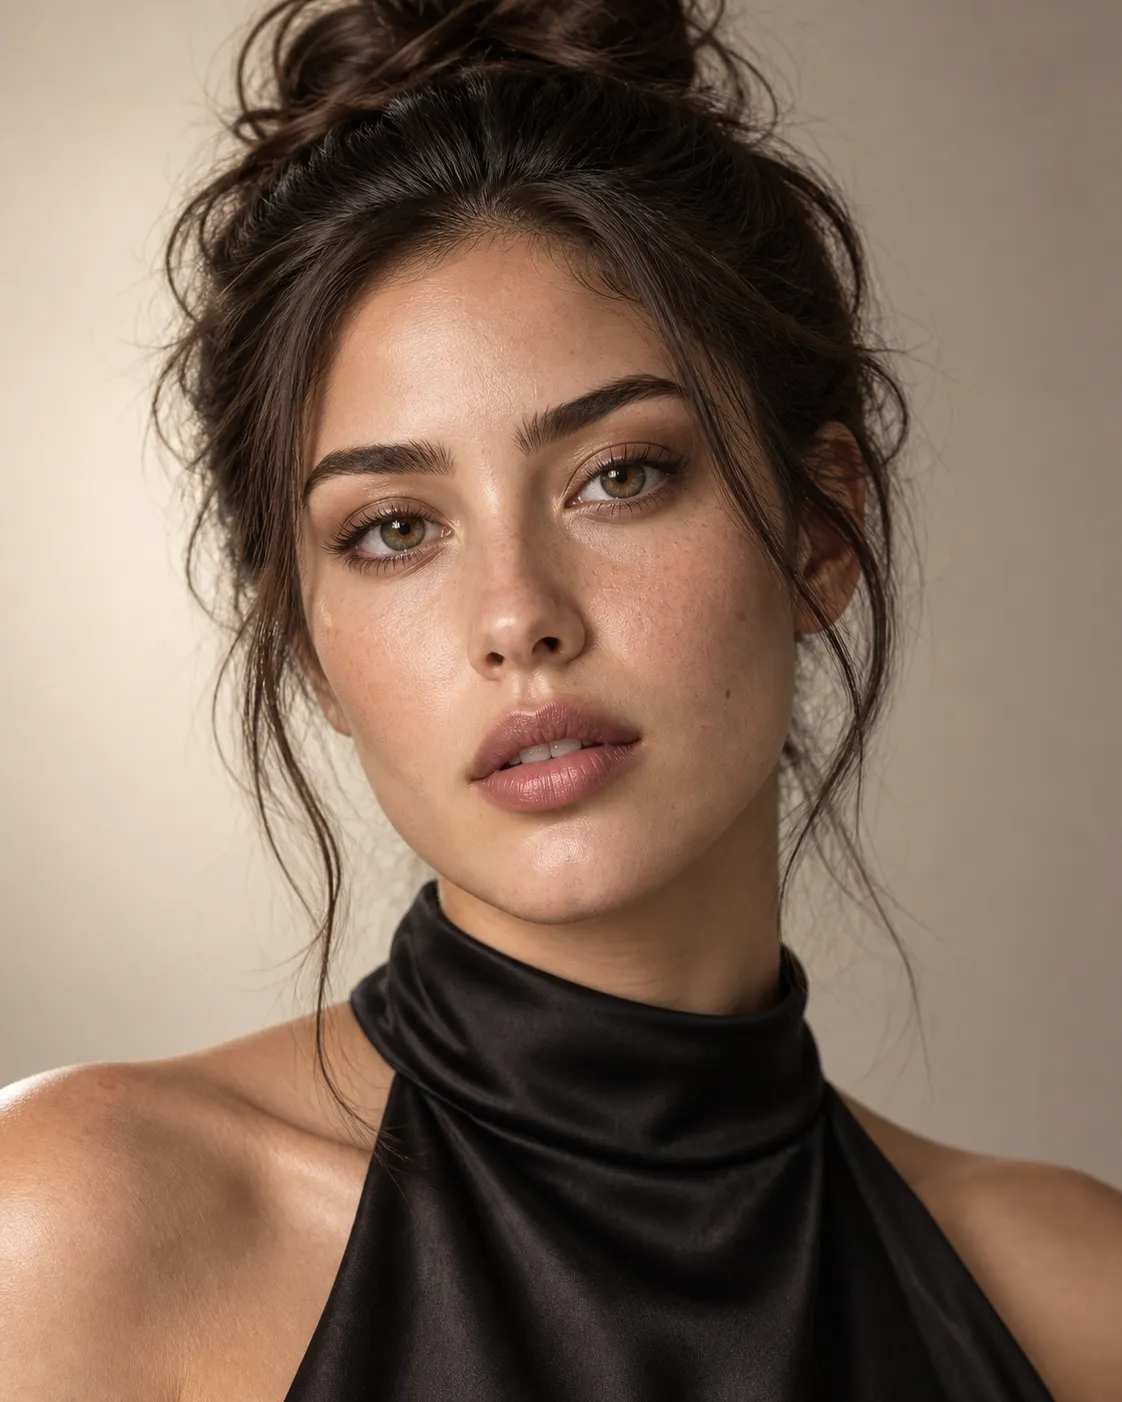
Caption: After restoration, the face shape, facial features, hazel eyes, high bun hairstyle, makeup, and lighting have all been preserved; only the skin surface has been gently restored with an appropriate amount of uneven detail.
When to Use Image Quality Enhancement
Image quality enhancement should be applied only after composition, identity, lighting, and skin texture have already been established. It can help produce larger images or refine certain details, but it cannot correct errors such as distorted face shapes, fabricated pores, or unrealistic highlights.
A more reliable sequence is:
Original version backup → Local skin repair → Identity comparison → 100% texture inspection → Necessary minor secondary adjustments → Final image quality enhancement.
After enhancement, re-examine the eyes, lip lines, hair strands, and hairline. The more sensitive the facial details, the less you should equate “increased sharpness” directly with “preservation of identity.”
Common Mistakes and How to Correct Them
Too many pores—like applying a texture overlay to the face.
Reduce the selection area and replace “clear pores” with “subtle, finely scaled textures that naturally follow facial contours.” At the same time, remove terms that emphasize excessive detail, such as “extremely sharp” or “ultra-high contrast.”
The skin looks more realistic, but the perceived age suddenly increases.
The model may interpret texture as deep wrinkles. Clearly maintain the original sense of age, restoring only fine pores, shallow lines, and vellus hairs, while avoiding adding nasolabial folds, eye bags, or obvious skin issues.
Small moles and freckles have disappeared.
These details are both skin characteristics and potential identity anchors. Exclude them from the selection, or explicitly specify their location, quantity, and size in the prompt while keeping these attributes unchanged.
The facial features remain unchanged, yet the face still doesn’t resemble the person.
Check the skin tone, eyebrow edges, hairline, and lighting on the face. A sense of identity comes not only from facial proportions but also from color, contour boundaries, and habitual expressions.
Sharpening the entire image at once makes it look very grainy.
Skin, hair, clothing, and background require different levels of detail. Return to the pre-sharpened version and focus only on areas that truly need enhancement; avoid masking local texture loss with global graininess.
Frequently Asked Questions
Can real photos and AI-generated portraits use the same level of restoration intensity?
Not recommended. For real-life photographs, prioritize preserving identity and existing details, applying restoration more conservatively. Fictional AI portraits can allow for more extensive reconstruction, but should still maintain consistency with the established setting and continuity between frames.
If the face occupies only a small portion of the frame, is it still worth repairing pores?
First consider the final purpose. If the face takes up only a tiny area and viewers primarily notice the face shape, lighting, and colors, overemphasizing pore refinement may yield little practical benefit. When significant cropping or printing is required, prioritize sourcing a clearer original image instead.
Can I apply beauty filters first and then restore realistic textures afterward?
You can try this approach, but it’s easier to fall into a cycle of “erasing first, then guessing back.” It’s recommended to complete structural, lighting, and texture repairs first, followed by subtle makeup or skin tone adjustments.
How do you determine if restoration has gone too far?
If thumbnails clearly show visible graininess, changes in the subject’s age, overly sharp skin compared to the hair, or uniformly strong pores across every part of the cheeks, it usually indicates excessive restoration.
How should group photos be handled?
Process each person individually, clearly identifying the target face each time while protecting others. Simultaneous re-rendering of multiple subjects increases the risk of identity confusion, facial feature drift, and inconsistent skin textures.
Summary
To reduce the plastic-like appearance of AI-generated portraits, structure the task into a verifiable workflow:
Locate the cleanest original version → Distinguish between texture, highlight, and color issues → Lock down identity anchors → Make minor edits to the skin → Perform an overall identity check → Zoom in to examine textures → Finally enhance image quality.
When working on portraits in PixPix, don’t just aim for “more realism” in your prompts—instead, clearly specify which skin details need restoration and which facial features must remain unchanged. The truly effective result is skin that no longer looks plastic, while still maintaining the subject’s recognizable identity.

AI Image Tool Built for E-commerce Teams
For new product launches, advertising, and promotional campaigns, use AI to generate product images, scene visuals, ad creatives, and short video assets — making content production faster.